Managing Passes
Passes are essential to the VeriFLY App. You must have a valid pass to be able to access services.
To obtain a valid pass, the user must have successfully completed all required steps to validate the credentials required for that pass. A pass will only be valid if all the credentials required for that pass are valid.
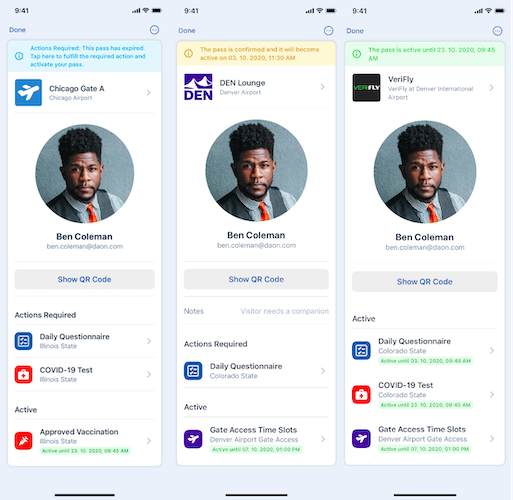
A pass can show different information on the Pass screen:
- Pass status (Active, Action Required, Confirmed)
- User details (Photo, Name, Surname, email address)
- QR Code (Some passes will have a QR generated if all credentials are valid)
- List of credentials and their status

How to add a pass by scanning a QR code
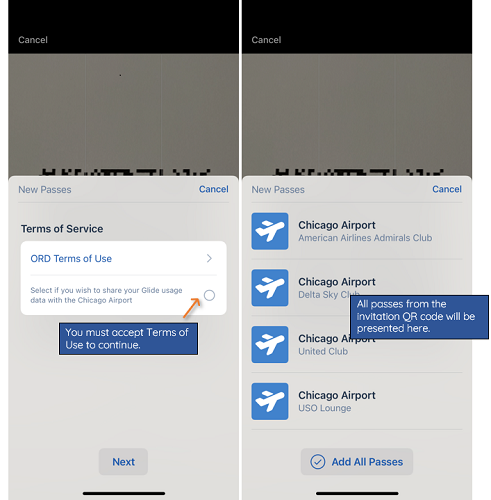
If you have received the invitation email, scan the QR code. If the QR code is successfully scanned, the user will be presented with the Pass Provider’s Terms of Service. You must accept to be able to acquire and use the associated pass.
How to add a pass using Search
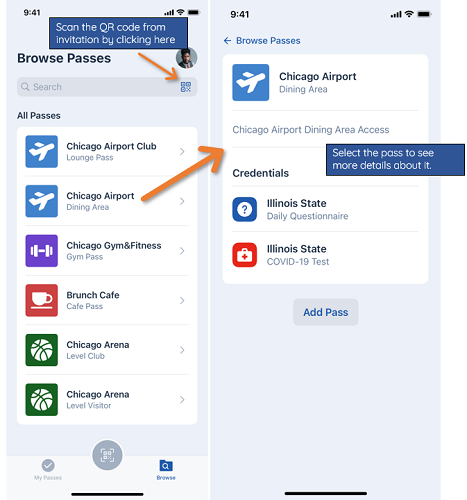
- Click "Browse" to view a specific pass or search from a list of available passes.
Adding Passes by Browsing
- Click "Browse" to search for a pass or select one from the list.
Once a pass is selected, the user will be able to view the pass and the required credentials for the pass and then add the pass to the "My Passes" folder.
Managing Existing Passes

A Pass can have one of the following status:
| Status | Meaning |
|---|---|
| Active | The Pass has the required valid Credential(s) and so it is Active. The user can use the pass to access the service. |
| Action Required | The Pass has Credentials that Require Action in order to validate and use the Pass. |
| Confirmed | The Pass is Confirmed when all required Credential(s) are valid but the service is not yet ready for use. |
Different Status of Passes – Examples
How to remove a Pass
A user can remove a pass by selecting it and accessing the Remove Pass option from the menu.